In this article, I will explain how to connect to a Raspberry Pi Zero via USB.
Step 1: Installing Raspbian
There are many tutorials available for installing Raspbian, so I won’t explain this step. After writing the Raspbian image to the memory card, without removing it, go to the boot partition and create an “ssh” file on the memory card.
touch sshStep 2: Creating Necessary Files for Raspberry Pi Connection
To access the Pi Zero via SSH over USB from your device, we need to edit two files.
The first file is config.txt, located in the boot partition (/boot/config.txt). Edit it and add the following line at the end:
dtoverlay=dwc2Then, edit the cmdline.txt file located in the boot partition (/boot/cmdline.txt), and add the following line after rootwait.
(Note: Ensure there is only one space between “rootwait” and the line below. Otherwise, it may not work properly. If there is already text after “rootwait,” you should still add the line after “rootwait,” with one space after both “rootwait” and “g_ether.”)
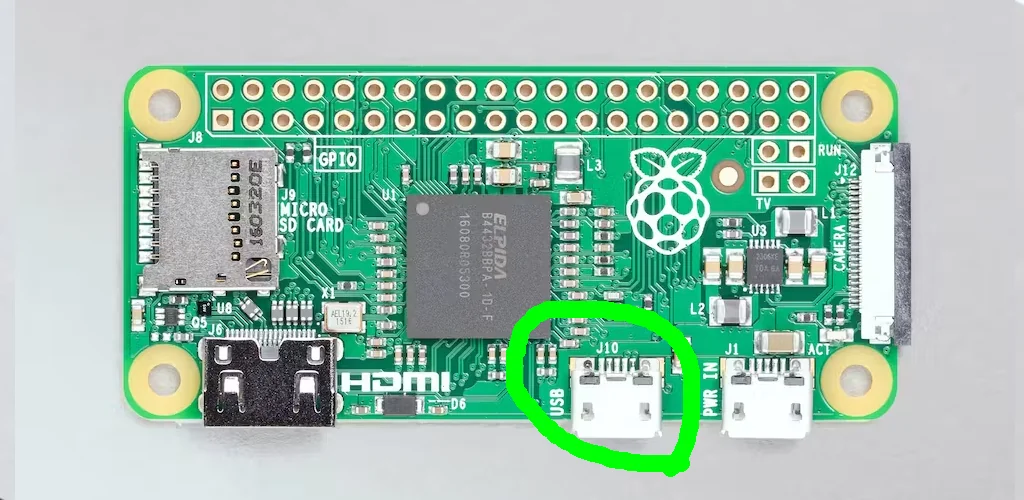
modules-load=dwc2,g_etherNow, safely remove the memory card and connect the Raspberry Pi to your host using a USB OTG cable.
At this point, the Raspberry Pi Zero configuration is complete. Now, we need to configure the system from which we want to connect to the Raspberry Pi.
Step 3: Configuring the Host
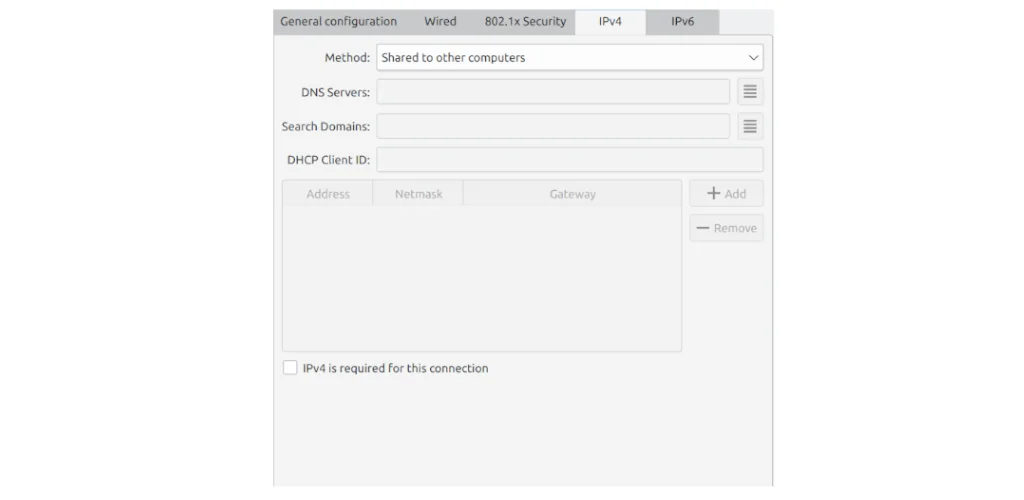
On your distro, go to the network settings. Then, create a new connection of type Wired Ethernet, edit the connection, and in the “IPv4 Settings” tab, set the “Method” to “Shared with other computers.”
Next, disconnect and reconnect the newly created connection. After reconnecting, enter the following command:
ping rasberrypi.localIf the ping is successful, you can easily connect to your Raspberry Pi using the following command:
Let me know if you need any more clarifications!
Related Posts:
Save, Load and Transfer Docker Images Easily
20 Linux Basic Commands You Must Know
A solution for the yellow tint issue on laptop screens
Changing the database in Magento